Location: Brisbane, Queensland
Category: Wall Repair / Interior Renovation
Service: Drywall Hole Repair Using AustralianPDS Wall Patch
Client Goal: Fix a damaged wall quickly and cleanly, ready for painting
Project Overview
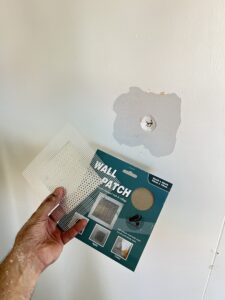
In this project, we repaired a damaged interior wall using the AustralianPDS Wall Patch – Self-Adhesive Drywall Repair Patch.
The client had a medium-sized hole in their plasterboard caused by a wall fixture. Instead of replacing the entire board or hiring an expensive drywall contractor, we restored the wall using this simple three-step system: Sand → Apply → Cover.
The AustralianPDS Wall Patch provides strong reinforcement, smooth finish, and a fast turnaround — perfect for quick repairs, renovations, rental property fixes, or pre-painting preparation.
Before & After Highlights
Before
Hole in the wall exposing the plasterboard
Uneven, damaged edges around the hole
Loose debris and rough surface unsuitable for painting
After
Reinforced patch securely covering the damaged area
Smooth compound finish matching the surrounding wall
Fully restored surface ready for priming and painting
The Repair Process
1. Preparing the Surface
We started by lightly sanding the damaged area to remove debris and loose paint. This ensures the patch adheres securely.
After sanding, the wall was wiped clean to create a dust-free surface.
2. Applying the Wall Patch
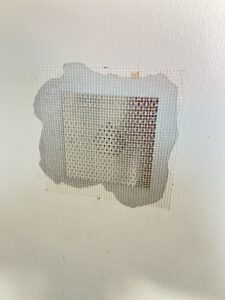
Next, we removed the backing paper and positioned the AustralianPDS Wall Patch directly over the hole.
The self-adhesive mesh held the metal-backed patch firmly in place, instantly reinforcing the damaged plasterboard.
This step stabilises the surface and eliminates the need for cutting new plasterboard pieces.
3. Covering with Compound
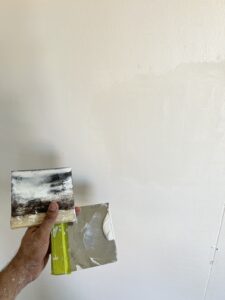
Using a wide scraper, we applied a thin, even layer of patching compound over the entire surface of the mesh patch.
We feathered the edges to blend it seamlessly with the surrounding wall.
After allowing it to dry completely, the area was lightly sanded for a smooth finish. The wall is now ready for priming and painting.
Tools & Products Used
All core materials used for this repair are available from AustralianPDS:
AustralianPDS Wall Patch – Self-Adhesive Drywall Repair Patch
(Product link: https://australianpds.com.au/index.php/product/australianpds-wall-patch-self-adhesive-drywall-repair-patch/)
Textured or smooth finishing compound
Sanding sponges (AustralianPDS Sanding Blocks recommended)
Spatula / scraper tools
Primer & paint (after repair)
Benefits of Using the AustralianPDS Wall Patch
Fast and easy 3-step process
Strong metal backing for long-term durability
Self-adhesive mesh ensures firm placement
Suitable for walls and ceilings
Perfect for rentals, renovations, and pre-painting repairs
Provides a professional finish even for DIY users
Result
The damaged wall was fully restored with a clean, smooth finish — ready for painting and blending seamlessly with the existing interior.
The AustralianPDS Wall Patch made the repair process quick, clean, and cost-effective for the client.
This project demonstrates how a simple tool can deliver a professional-quality result with minimal effort and no need for major construction work.
Need a Wall Repair?
Whether you’ve got dents, cracks, old fixture holes or general wear-and-tear, the AustralianPDS Wall Patch provides a smart, affordable solution.
Visit our store to shop the product or contact us for more renovation support.